
React Redux Tutorial for Beginners - Simply Explained (2020)
As a developer new to React, I was thrown into a Redux project in which I had no idea how to navigate. I searched for all sorts of tutorials to help me better understand the concept, but things just didn't click.
I was left with so many unanswered questions:
- What is state and why does everyone keep referencing it?
- How does Redux help manage state?
- Actions and reducers... what the hell are those?
- How do I integrate Redux into a React project?
- Is all of this extra work actually worth it?
If you've ever struggled to learn Redux and its add-ons such as Redux Thunk, this is THE tutorial that will finally help you understand what these libraries do, why we use them, and when you should use them.
By the end of this tutorial, you'll be able to successfully utilize Redux in all of your projects in a clean and scalable manner in which other devs can hop right on in and contribute to your project immediately.
What is state?
Since Redux is what's known as a state management tool, we first must understand what state is and how it's used within our projects.
I personally dislike the term "state," there are so many things state can reference: Alaska, a political party, or an object's condition at a certain time (this is the correct definition for development). The ambiguity of the word makes it harder to understand for those new to frameworks like React, Angular, and Vue.
In concrete terms, state is a JavaScript object:
const state = {}
Inside of this JavaScript object, we add properties:
const initialState = {
  posts: [],
  signUpModal: {
    open: false
  }
}
Using a framework like React, we can then tell certain parts of code to only show based on whether or not these values meet a certain criteria, such as whether the signUpModal's open property is equal to true or false:
<div className={this.state.signUpModal.open ? 'hidden' : ''}>Sign Up Modal</div>
Try me!
modalOpen: false
}
When this.state.signUpModal.open is equal to false, React will automatically add a hidden class to our modal, giving it a display: none;. When this.state.signUpModal.open is equal to true however, we remove this class, which in return shows the modal.
Writing similar functionality with vanilla JavaScript (without the required event listeners) would look something like this:
const signUpModal = {
  open: false
}

if (signUpModal.open === false) {
  document.querySelector('div').classList.add('hidden')
} else {
  document.querySelector('div').classList.remove('hidden')
}
Technically we're still using some sort of state here with the signUpModal constant, but you'll notice things are a bit cleaner when using React since it's setup to automatically apply classes based on state.
Using a stateful framework like React, Vue, or Angular allows for clean code, and allows you to focus on how your app's data effects how your app displays to an end-user.
In all, state references the condition of something at a particular point in time, such as whether a modal is open or not.
I prefer to think of state in concrete terms such as a JavaScript object, since that's what we're actually referencing when we talk about state in the first place.
Altering this JavaScript object's properties will automatically update them on your frontend (if rendered there), and will also automatically hide and show HTML based on how your set things up like we did in the above React example—no extra JavaScript required.
This is what we call "Reactivity" since our HTML (view) is reacting to our state, thus how the name "React" was derived.
Managing State
React apps are made out of components: small, contained JavaScript files where you can keep all of your HTML and JavaScript in one place.
A component can be something as large as a page, and contain many smaller components such as modals and alerts.
Components typically have their own individual state which determines how they should display and function. This is known as local state.
class Modal extends React.Component {
  constructor(props) {
    super(props)
    this.state = {
      title: 'Sign Up',
      description: 'Enter a username and password here.'
    }
  }

  render() {
    return (
      <div>
        <h1>{this.state.title}</h1>
        <p>{this.state.description}</p>
      </div>
    )
  }
}
If a component is used inside of another component, it creates a nest-like structure. The embedded component is called a child component.
import Form from '~components/Form.js'

class Modal extends React.Component {
  constructor(props) {
    super(props)
    this.state = {
      title: 'Sign Up',
      description: 'Enter a username and password here.'
    }
  }

  render() {
    return (
      <div>
        <h1>{this.state.title}</h1>
        <p>{this.state.description}</p>
        <Form></Form>
      </div>
    )
  }
}
If the child component requires a state value that's already available in its parent component, the parent component can pass the value through to the child as a prop.
import Form from '~components/Form.js'

class Modal extends React.Component {
  constructor(props) {
    super(props)
    this.state = {
      title: 'Sign Up',
      description: 'Enter a username and password here.',
      submitButtonText: 'Join Chris Courses'
    }
  }

  render() {
    return (
      <div>
        <h1>{this.state.title}</h1>
        <p>{this.state.description}</p>
        <Form submitButtonText={this.state.submitButtonText}></Form>
      </div>
    )
  }
}
Now each time the parent component's state changes, the child component's prop will be changed as well.
This is just fine for small React apps, and I'd recommend developing using local state and props until you start running into a few problems:
- Passing state down through more than two components makes all of the components rely on each other which isn't very scalable
- Using the same state through components that don't have a parent / child relationship is redundant and can require addition calls to a backend server
The solution to these problems? Redux.
What is Redux?
Redux is a package that creates a global state which you can share between React components—no parent / child relationship required.
As you'll see down the line, Redux also allows you to view your app as different state changes occur thanks to its robust developer tools. When using Redux, you don't actually change the state, you create updated copies of the state that are then inserted into your React components.
Repeat after me: You don't actually change the state, you create updated copies of the state. This is probably one of the most important things to understand about Redux's state changing pattern, make sure you commit it to memory.
We'll get to illustrating that, but first, we have to learn a few things regarding Redux setup and the pattern it uses to update and retrieve state. There are be a few new pieces of jargon that I'll do my best to explain:
- Stores
- Reducers
- Actions
The Redux Store
Redux places all of your components' state in one central location. This makes it accessible to all components without requiring a parent / child relationship. The central location in which we store the state is called a store.
I like thinking of the store as a global JavaScript object in which all of our components can access. This JavaScript object is immutable, meaning it cannot be changed directly, but it can be cloned and replaced with its properties updated instead. This cloning gives us the ability to see how our app looks at particular point in time due to its state changes—quite useful for debugging purposes.
To create a Redux store, we'll need to install Redux.
First, let's scaffold a quick React project that we can insert Redux into:
npx create-react-app my-app
Once your app is scaffolded, cd into the my-app directory and install redux:
cd my-app
npm install redux --save
To create a global Redux store, we just need to create a .js file, then import this .js file into src/index.js—the main js file being used within our app.
Create a directory for the store with the following command:
mkdir -p src/store
Then create a file called index.js witin this new directory:
touch src/store/index.js
Finally, add the following code which will hold our store:
import { createStore } from 'redux'

const store = createStore()

export default store
In order to create a store, we need to use the createStore() function imported from Redux. This creates a JavaScript object with a small API (set of properties and functions) attached to it.
This API includes the following:
- getState for accessing the current state of the application
- dispatch for changing state via an action
- subscribe for responding to state changes
We could've just exported a simple JavaScript object that acts as our state like so:
const state = {
  posts: [],
  signUpModal: {
    open: false
  }
}

export default state
But then we would be editing state directly, rather than making copies of it with updated properties like Redux allows us for. We also wouldn't have access to the dispatch method Redux provides for editing our state.
Again, cloning and updating our state is important since we can then traverse between the different states our app is affected by using redux devtools (a browser extension). This gives us insight into what state changed when and how it affected our app, information that's very useful once your state starts getting larger and larger.
One thing to note is that this createStore() function actually requires an argument to work: a reducer.
Redux Reducers
A reducer is just a function that takes two arguments and returns your app's current state. The two arguments it takes are:
- Your current state (JavaScript object)
- An action (also a JavaScript object)
const reducer = (state, action) => {
  return state
}
It's common to set your app's current state before your reducer, then set it as the argument's default value:
const initialState = {
  posts: [],
  signUpModal: {
    open: false
  }
}

const stateProducer = (state = initialState, action) => {
  return state
}
When integrated into our store, our file looks something like this:
import { createStore } from 'redux'

const initialState = {
  posts: [],
  signUpModal: {
    open: false
  }
}

const reducer = (state = initialState, action) => {
  return state
}

const store = createStore(reducer)

export default store
Since we're using this reducer function as an argument within createStore(), it will be called a couple of times:
- Once on initialization (this sets our store's initial state)
- And every time an action is dispatched
This leads us to our next term of Redux Jargon, you guessed it: actions.
Redux Actions
Redux actions are JavaScript objects that contain two properties: type and payload. These actions are "dispatched," or used as arguments by the Redux store's dispatch API method.
A typical Redux action looks as follows:
{
  type: 'ADD_POST',
  payload: { id: 1, title: 'Redux Tutorial 2019' }
}
All this object does is describe how our app is updating its state via the type property, while containing the data that we'd like to insert into our main state object.
To actually "call" this action, we need to use our store's dispatch method as mentioned earlier:
store.dispatch({
  type: 'ADD_POST',
  payload: { id: 1, title: 'How to Use Redux' }
})
When called, this will run the reducer function that we created earlier. Our action is passed through as the second argument of this reducer function, and we can then determine how we want to update our state based off what action was specified:
import { createStore } from 'redux'

const initialState = {
  posts: [],
  loginModal: {
    open: false
  }
}

const reducer = (state = initialState, action) => {
  if (action.type === 'ADD_POST') {
    state.posts.push(action.payload)
  }

  return state
}

const store = createStore(reducer)

export default store
This would successfully update our store, but there's an issue: we're updating our state directly rather than creating a copy of it and updating that instead. Remember, we want to create an updated clone so we can view exactly what our app looks like at certain states after actions are dispatched:
import { createStore } from 'redux'

const initialState = {
  posts: [],
  loginModal: {
    open: false
  }
}

const reducer = (state = initialState, action) => {
  if (action.type === 'ADD_POST') {
    return Object.assign({}, state, {
      posts: state.posts.concat(action.payload)
    })
  }

  return state
}

const store = createStore(reducer)

export default store
Here when an ADD_POST action is dispatched, we clone our initial state using Object.assign({}, state). With our initial state cloned, we then override its posts property with the third argument:
{
  posts: state.posts.concat(action.payload)
}
We return this updated state to our store, terminating the reducer function and preventing it from continuing any further:
return Object.assign({}, state, {
  posts: state.posts.concat(action.payload)
})
This is all we need to get Redux's global store created and reacting to dispatched events.
Testing The Store
We can test things in our browser console by importing our store into src/index.js, and assigning it to window:
import React from 'react'
import ReactDOM from 'react-dom'
import './index.css'
import App from './App'
import * as serviceWorker from './serviceWorker'

import store from './store/index'
window.store = store

ReactDOM.render(<App />, document.getElementById('root'))

// If you want your app to work offline and load faster, you can change
// unregister() to register() below. Note this comes with some pitfalls.
// Learn more about service workers: https://bit.ly/CRA-PWA
serviceWorker.unregister()
Start the React app with terminal (make sure you're in the my-app directory):
npm run start
Then open up your browser console with cmd + option + j
Remember previously, we referenced Redux's API methods:
- getState for accessing the current state of the application
- dispatch for changing state via an action
- subscribe for responding to state changes
Let's get our store's initial state by calling store.getState()
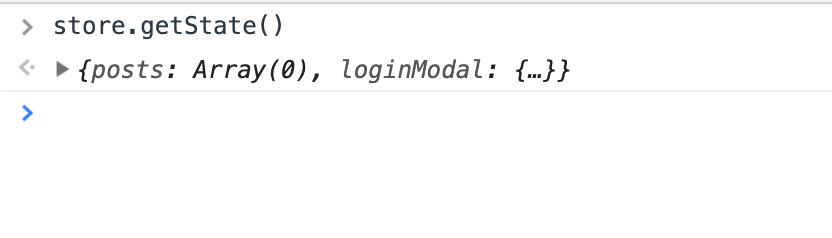
You'll notice our returned state on the second line represents the initial state set in our store.
Let's say we want to update this state.
To update state, we dispatch an action, which remember, an action is just a JavaScript object with type and payload properties.
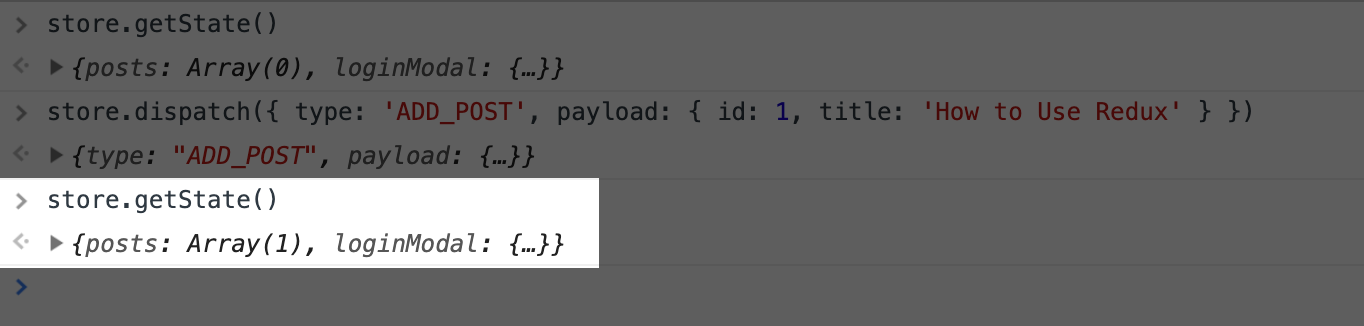
Dispatch an action in the browser console with the following:
store.dispatch({
  type: 'ADD_POST',
  payload: { id: 1, title: 'How to Use Redux' }
})
Call store.getState() again, and you'll notice that our state's posts property has been updated with the payload we passed through via our action:
Redux is simply a library that ensures we follow a certain pattern to update our global state. Following this pattern, we can accurately tell what's going on in our app without getting lost in the various state changes occurring throughout.
Connecting Redux to React
Note, everything we've done so far has taken place in a self-created JavaScript file, separate from anything React related.
As mentioned prior, Redux is framework agnostic—we could integrate it into a Vue or Angular project just as we're about to do with React.
In order to access our store's global state within React components, we must download another package—react-redux:
npm install react-redux --save
react-redux provides a component called Provider and a function called connect.
The Provider component wraps around React's root App component.
We pass our store through as a prop to "provide" it to all components within our app:
import React from 'react'
import ReactDOM from 'react-dom'
import './index.css'
import App from './App'
import * as serviceWorker from './serviceWorker'

import { Provider } from 'react-redux'
import store from './store/index'
window.store = store

ReactDOM.render(
  <Provider store={store}>
    <App />
  </Provider>,
  document.getElementById('root')
)

// If you want your app to work offline and load faster, you can change
// unregister() to register() below. Note this comes with some pitfalls.
// Learn more about service workers: https://bit.ly/CRA-PWA
serviceWorker.unregister()
We can now access our state directly within components using react-redux's connect function.
To use react-redux's connect function, head to whichever component you'd like to use it in. In this instance, we'll be using our App component since that's the only component scaffolded for us by create-react-app.
Inside of src/App.js, import connect from react-redux.
Then, instead of exporting just our App component, we'll be exporting our App component WITH the connect function we just imported:
import React from 'react'
import logo from './logo.svg'
import './App.css'
import { connect } from 'react-redux'

function App() {
  return (
    <div className="App">
      <header className="App-header">
        <img src={logo} className="App-logo" alt="logo" />
        <p>
          Edit <code>src/App.js</code> and save to reload.
        </p>
        <a
          className="App-link"
          href="https://reactjs.org"
          target="\_blank"
          rel="noopener noreferrer"
        >
          Learn React
        </a>
      </header>
    </div>
  )
}

const mapStateToProps = state => {
  return { posts: state.posts }
}

export default connect(mapStateToProps)(App)
The connect function takes another function as an argument: mapStateToProps. mapStateToProps determines what state from our store we want to pull into our component. In this case, we're specifying to only pull our state's posts property.
Once this is passed through to connect on line 31, we can then access our store's state by passing through whatever properties were specified in mapStateToProps into our component's render function, App().
import React from 'react'
import logo from './logo.svg'
import './App.css'
import { connect } from 'react-redux'

function App({ posts }) {
  return (
    <div className="App">
      <header className="App-header">
        <img src={logo} className="App-logo" alt="logo" />
        <p>
          Edit <code>src/App.js</code> and save to reload.
        </p>
        <a
          className="App-link"
          href="https://reactjs.org"
          target="\_blank"
          rel="noopener noreferrer"
        >
          Learn React
        </a>
        <ul>
          {posts.map(post => (
            <li key={post.id}>{post.title}</li>
          ))}
        </ul>
      </header>
    </div>
  )
}

const mapStateToProps = state => {
  return { posts: state.posts }
}

export default connect(mapStateToProps)(App)
This is actually a lot of work just to get a store's state passed through to a component. I prefer Vue's way of accessing a store's state, which is through a global
$stateobject (no importing of packages ormapStateToPropsfunctions required).
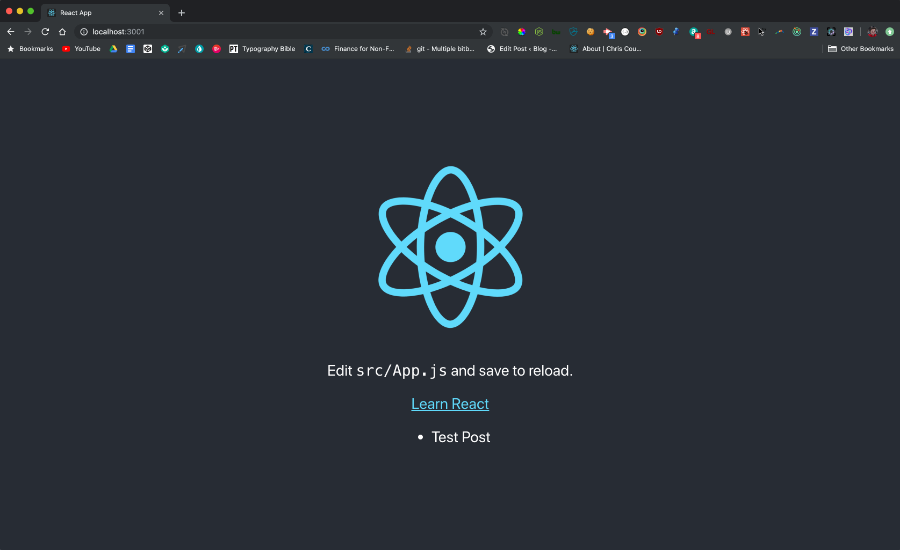
Note, nothing is showing yet, but that's because we don't actually have any posts available within our store's initial state.
Add a test post inside of your store's initial state:
import { createStore } from 'redux'

const initialState = {
  posts: [{ id: 1, title: 'Test Post' }],
  loginModal: {
    open: false
  }
}

const reducer = (state = initialState, action) => {
  if (action.type === 'ADD_POST') {
    return Object.assign({}, state, {
      posts: state.posts.concat(action.payload)
    })
  }

  return state
}

const store = createStore(reducer)

export default store
Refresh your app, and you should see your Redux store's state being displayed now:
In summary, to connect Redux to React, you must do the following:
- Install and import
react-redux - Wrap your root
Appcomponent inside ofreact-redux's Provider component - Import
connectinto the component you'd like to pull Redux state into - Create a
mapStateToPropsfunction that determines what state you'd like to pull from your store - Export your component using
connect, takingmapStateToPropsas an argument - Pass through your state as an argument to your render function
- Render your state
It's quite a lot in my opinion just to get a global state pulled into a component, but it's just the way it is at the moment with how React and react-redux are integrated together.
Dispatching Redux Events from Components
Next we'll take a look at how to update our store directly from our components by dispatching actions based on user interactions.
For actions to take place, we should create an interface in which the user can perform some sort of task.
Inside src/App.js, we've been exporting our component as a function, however, if we want to start adding interactivity via React event listeners, we need to convert it to a Class Component:
import React from 'react'
import './App.css'
import { connect } from 'react-redux'

class App extends React.Component {
  constructor() {
    super()
    this.state = { value: '' }

    this.handleChange = this.handleChange.bind(this)
    this.handleSubmit = this.handleSubmit.bind(this)
  }

  handleChange(event) {
    this.setState({ value: event.target.value })
  }

  handleSubmit(event) {
    alert('Content submitted: ' + this.state.value)
    event.preventDefault()
  }

  render() {
    return (
      <div className="App">
        <header className="App-header">
          <form onSubmit={this.handleSubmit}>
            <input
              type="text"
              value={this.state.value}
              onChange={this.handleChange}
            />
            <div>
              <button type="submit" onClick={this.handleSubmit}>
                Submit
              </button>
            </div>
          </form>
          <ul>
            {this.props.posts.map(post => (
              <li key={post.id}>{post.title}</li>
            ))}
          </ul>
        </header>
      </div>
    )
  }
}

const mapStateToProps = state => {
  return { posts: state.posts }
}

export default connect(mapStateToProps)(App)
A few new things going on here:
- Line 5: We've converted our function to a class using
class App extends React.Component { - Line 8: We created a local state object to hold whatever text we insert inside our form's input field
- Lines 10-11: We bind
thisto our two class component functions so we can use them within React event listeners - Lines 14-16: We create a
handleChangefunction that responsible for setting our local state each time a user enters a character into our input field - Lines 18-21: We create a
handleSubmitfunction that will eventually determine how we add state to our Reedux store - Lines 23-47: We remove excess code scaffolded from create-react-app such as the logo and default text. We then add a form with an input field and submit button above our list. We add React event handlers such as
onSubmit={}and specify what should happen when those events occur by calling the functions we declared on lines 14-21. Finally, we assign state our input field's value to our local state so we can access it later on in ourhandleSubmitfunction.
Breathe. It's a lot to take in if you're new to React's class components.
Really, we just need a way to respond to user interaction, and converting the function to a class is just the way you do that.
Also, don't worry about the fact we're using local state in tandem with Redux's global state—our value property will only ever be used in this one component, so making it global with our Redux store would be a bit overkill.
In addition to our mapStateToProps function, we're also going to add a
mapDispatchToProps function which will give us access to our Redux store's dispatch method:
import React from 'react'
import './App.css'
import { connect } from 'react-redux'

class App extends React.Component {
  constructor() {
    super()
    this.state = {
      value: '',
      postId: 2
    }

    this.handleChange = this.handleChange.bind(this)
    this.handleSubmit = this.handleSubmit.bind(this)
  }

  handleChange(event) {
    this.setState({ value: event.target.value })
  }

  handleSubmit(event) {
    event.preventDefault()
    this.props.dispatch({
      type: 'ADD_POST',
      payload: { id: this.state.postId, title: this.state.value }
    })

    this.setState({ postId: this.state.postId + 1 })
  }

  render() {
    return (
      <div className="App">
        <header className="App-header">
          <form onSubmit={this.handleSubmit}>
            <input
              type="text"
              value={this.state.value}
              onChange={this.handleChange}
            />
            <div>
              <button type="submit" onClick={this.handleSubmit}>
                Submit
              </button>
            </div>
          </form>
          <ul>
            {this.props.posts.map(post => (
              <li key={post.id}>{post.title}</li>
            ))}
          </ul>
        </header>
      </div>
    )
  }
}

const mapStateToProps = state => {
  return { posts: state.posts }
}

const mapDispatchToProps = dispatch => {
  return {
    dispatch
  }
}

export default connect(mapStateToProps, mapDispatchToProps)(App)
By creating a mapDispatchToProps function and passing it as the
second argument to connect, we're making our store's
dispatch method available for use within our component's
this.props object.
You'll see in our handleSubmit function, we're now dispatching
a Redux event, which in return, calls our Redux reducer currently set up in
our store (what the reducer does is all dependent on the action's type
property). We're also incrementing each posts id by one so we
can have a unique identifier for each post.
We've now officially pulled state from our Redux store, and updated this state by dispatching a Redux event from our React Component.
If you'd like your changes to persist (stay in place after page refresh), you'd want to add your new posts to a database within your reducer function's action handlers.
This is all looking great, but things would be easier to visualize and understand if we had a way of viewing WHEN our actual actions take place, and how our state changes as a result. This is all possible when integrating Redux DevTools.
Redux DevTools
Redux DevTools is a browser extension that allows you to view your Redux store's state at any particular time. It's what allows you to "time travel" through your app as different state changes occur, so you can see what your app looks like at any point in time due to some sort of user interaction.
The Redux DevTools extension is one of the main reasons Redux is beneficial for development in the first place—it's time travel features help pinpoint bugs very efficiently compared to trying to track things down manually.
To integrate Redux DevTools, follow the instructions on the Redux DevTools Extension Git repository for your particular browser.
Once you've installed the extension, you have to connect it manually to your Redux store by adding the following window properties as your store's second argument:
const store = createStore(
  reducer,
  window.__REDUX_DEVTOOLS_EXTENSION__ && window.__REDUX_DEVTOOLS_EXTENSION__()
)
Be sure to save your file, then open up your browser's inspector. You should now see a tab for Redux available. Click it, refresh your page, then start adding some posts. Watch what happens:
You'll notice that Redux DevTools is tracking our actions as we dispatch them through our code.
As we begin to dispatch more actions, we can then use Redux DevTools to see how our app looked before and or after we dispatched these actions. This is extremely useful for debugging as your app grows—more and more actions will be dispatched, more state will exist to manage, so having a running log of how your state is updated (and being able to interactively jump between different states) will provide valuable insight into how your app ends up looking the way it does.
With some nifty state tracking tools at our disposal now, let's go ahead a shift focus to integrating async data into our Redux state.
Redux Thunk
When it comes to pulling data asynchronously, most React / Redux practioners would recommend using a library like redux-thunk. However, Thunk is unnecessary the way we are dispatching actions.
Thunk is a library meant for handling action creators, functions meant solely to return "actions," JavaScript objects with a updated state data. Maybe there's some sort of reason for them, but I found action creators to be quite unnecessary when sending actions to a Redux store.
What's simpler, dispatching an action directly by inlining the object:
this.props.dispatch({
  type: 'ADD_POST',
  payload: { id: this.state.postId, title: this.state.value }
})
Or having to create a function just to produce the action object in the first place:
function addPost(payload) {
  return { type: 'ADD_POST', payload }
}

this.props.dispatch(addPost({ id: this.state.postId, title: this.state.value }))
I think most people would agree that the first way (the way we've been doing things) is simpler to follow since its flow is linear and it's also less lines of code.
I've heard using "action creators" is best practice, but I've yet to see why just yet. In my opinion, they add an unneeded layer of abstraction, and also make things harder to follow since you have to jump between files to import and export them.
As a result, I'd personally recommend against using action creators, and stick with dispatching action objects directly.
Redux and Async Data
Pulling in async data with React and storing into Redux is simple, all you have to do is:
- Setup your store's reducer to handle a new action
- Fetch the data and dispatch a corresponding action
Setting up our store's reducer is easy, simply add a new conditional to handle
a LOAD_POSTS action:
import { createStore } from 'redux'

const initialState = {
  posts: [{ id: 1, title: 'Test Post' }],
  loginModal: {
    open: false
  }
}

const reducer = (state = initialState, action) => {
  if (action.type === 'ADD_POST') {
    return Object.assign({}, state, {
      posts: state.posts.concat(action.payload)
    })
  }

  if (action.type === 'LOAD_POSTS') {
    return {
      ...state,
      posts: state.posts.concat(action.payload)
    }
  }

  return state
}

const store = createStore(
  reducer,
  window.__REDUX_DEVTOOLS_EXTENSION__ && window.__REDUX_DEVTOOLS_EXTENSION__()
)

export default store
You'll notice here we used
...stateinstead ofObject.assign()here. All this says is to make a copy of the previous state, then update it with whatever object properties are added after it.
Now when we fetch data asynchronously, we can send off the freshly pulled data to the action we just created:
import React from 'react'
import './App.css'
import { connect } from 'react-redux'

class App extends React.Component {
  constructor() {
    super()
    this.state = {
      value: '',
      postId: 2
    }

    this.handleChange = this.handleChange.bind(this)
    this.handleSubmit = this.handleSubmit.bind(this)
  }

  componentDidMount() {
    fetch('https://jsonplaceholder.typicode.com/posts')
      .then(response => response.json())
      .then(json => {
        this.props.dispatch({
          type: 'LOAD_POSTS',
          payload: json
        })
      })
  }
}
First, we create a class function called componentDidMount(), this is a function that'll fire once all of the HTML inside the component's render() function has been rendered to the browser. It's a place where we can write JavaScript to affect our page, as a result, we can use it to retrieve async data via JavaScript.
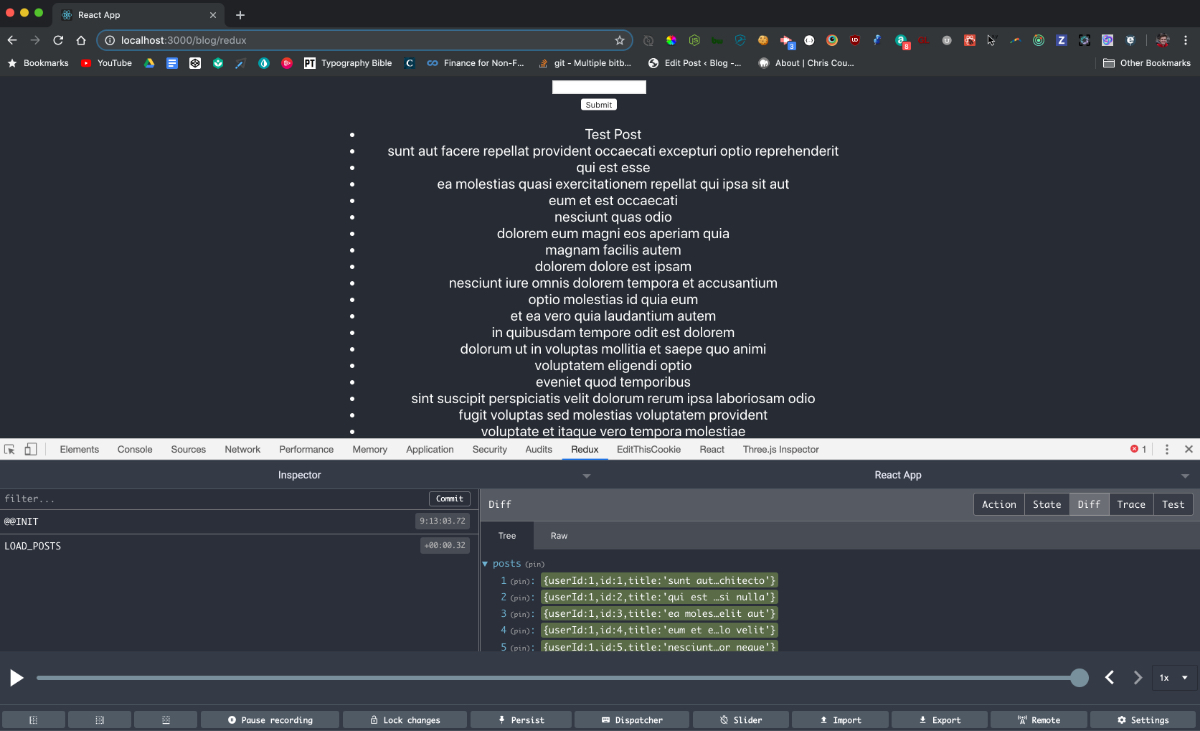
Second, we call JavaScript's native fetch() function which can be used to retrieve external data asynchronously. We're calling a dummy link (jsonplaceholder.typicode.com) that contains lorem ipsum data specifically for testing async calls like this.
We're then using promise notation to retrieve the JSON from the external URL, then using that JSON data for our action's payload on line 23.
Refresh the page, and you should now have all of the external JSON data loaded:
And with that, you should now be able to:
- Create a Redux store
- Connect your Redux store to React
- Update your store's state with actions
- Track your state changes via Redux DevTools
- And load data asynchronously into your Redux store
That brings us to the conclusion: Is all of this extra work worth it?
Conclusion
What we just did is a lot of extra work compared to managing state locally: we had to create a store via an external package, execute dispatch events, and more, rather than just setting state locally and updating things directly in the component.
So is this extra work worth it?
When your site scales in size and your components begin making use of shared data, then yes, Redux will save you time rather than take it away.
When state grows past twenty-ish properties, it can get difficult to keep up with what app interactions are changing your app's state. Not only that, but if two components share the same state and don't have a parent-child relationship, then you'd have to duplicate state and update it in two places. This is why Redux's global store ability is useful for keeping things clean and maintainable.
In the end, I found a lot of Redux tutorials and documentation to over-engineer things by spreading code across separate files and abstracting things without logical reason. Development actions like this may have their purpose when scale comes into play, but when it comes to teaching beginners how Redux works, I think they do more harm then good.
Hopefully this tutorial was able to help you, for more dev content and tips, be sure to follow me on Twitter at @christopher4lis.