Perfect Three.js Workflow with Alfred
Updated on April 2, 2023 to use Vite instead of webpack.
When it comes to a creating a development workflow that's easy and enjoyable to use, speed and efficiency are paramount. This tutorial will show you how to use Alfred (Powerpack and OSX required) to create a full fledged Three.js development environment in a matter of seconds.
So what does a perfect Three.js development workflow look like? It consists of a few things:
- Automatic project creation via a simple Alfred command
- Automatic scene updates via Hot Module Replacement (no page refresh required)
- Module bundling for web performance and scalability purposes
By automating the initial project creation, getting rid of page refreshes, and making use of module bundling, we'll effectively be shaving minutes, if not hours worth of time required to get a finished project up and running. Let's get started on how we can create a full blown Three.js project with a simple Alfred command.
Automatic project creation
The goal here is to create a new, fully-functional Three.js project using the Alfred command mk3 project-name (stands for make three project). To do this, we'll have to create a new Alfred workflow.
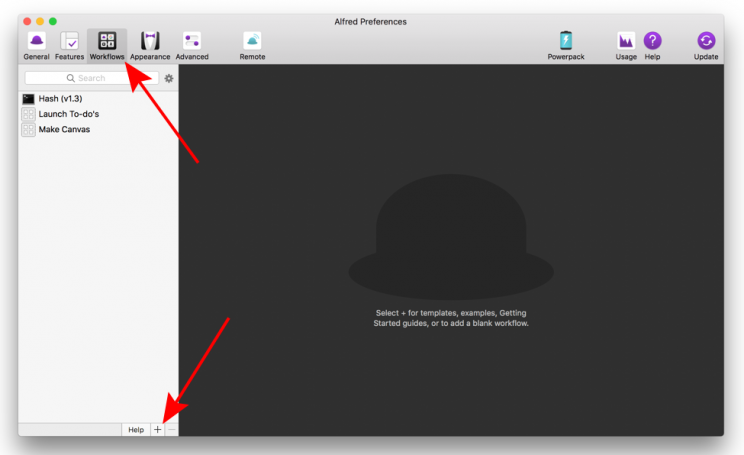
Open up Alfred, select the Workflows tab, and click the little plus button near the bottom lefthand corner of the screen:
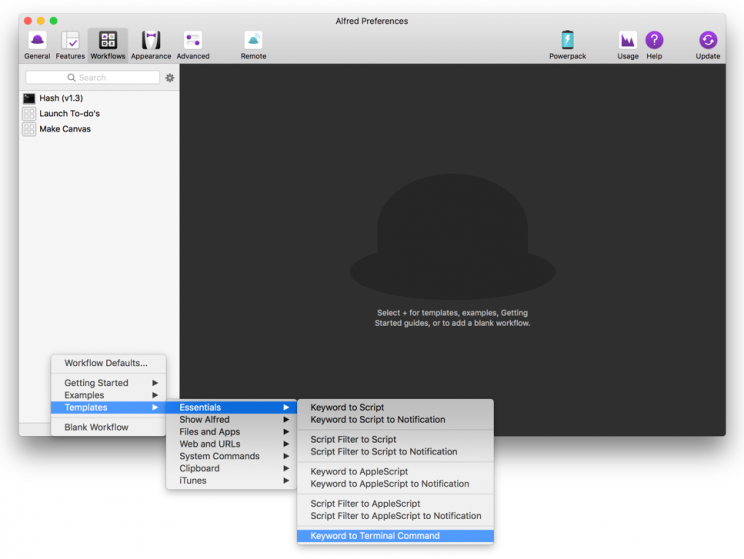
Add a new workflow by selecting Templates > Essentials > Keyword to Terminal Command:
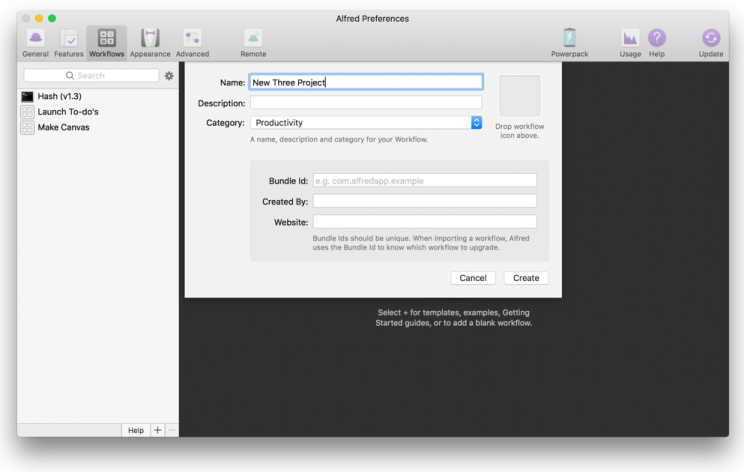
Add a name for your new workflow and click the create button. You can also add a description, category, and image if desired, but the only thing that's required is a workflow name:
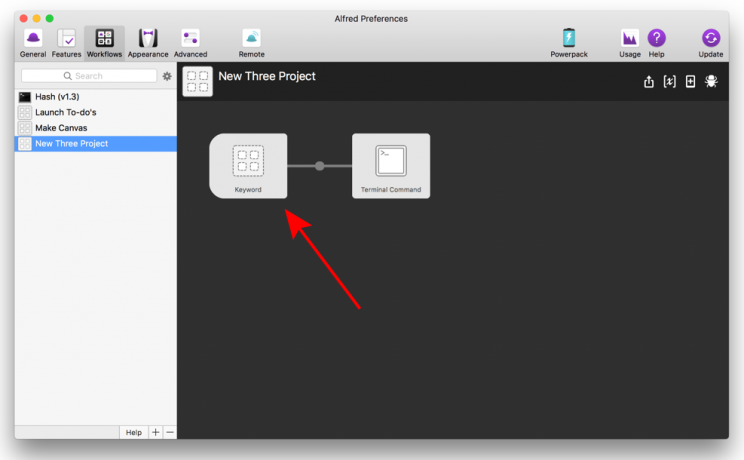
Now that we have a workflow template, double click on the keyword module so we can specify what keyword should be typed in order to create our new Three.js project:
Create a keyword and title for your workflow. I chose mk3 (make three) for mine because it's short and I value speed over readability for these kinds of things. You can change your keyword to whatever you're most comfortable with, just make sure you have the "with space" option checked and the "Argument Required" option selected. Hit save.
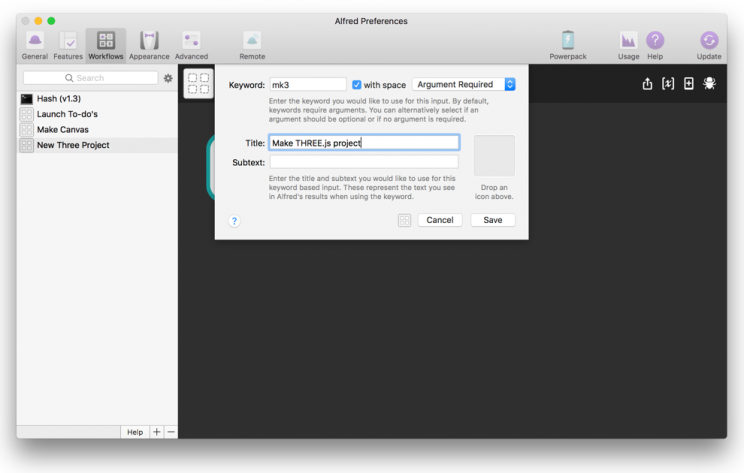
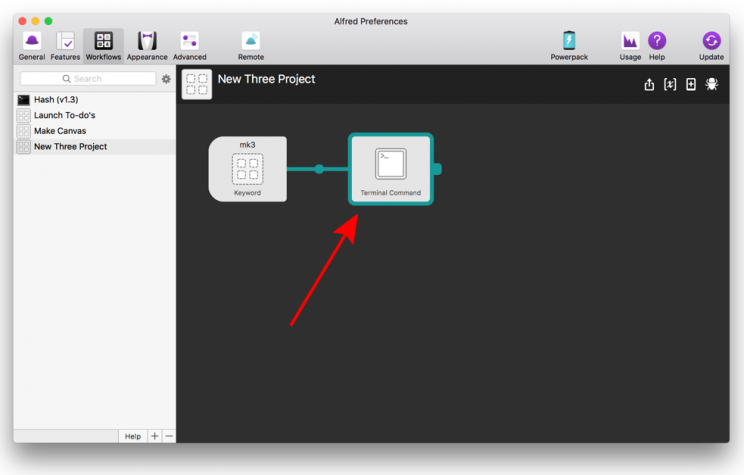
Now for the meat of the shortcut creation. Double click on the terminal command module.
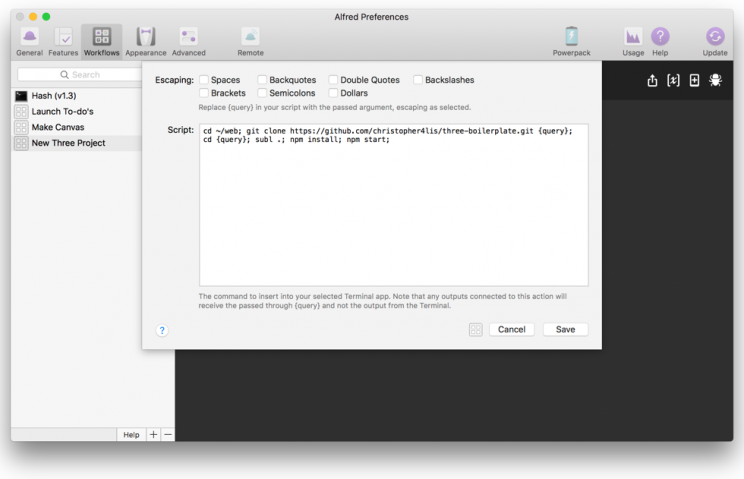
We're going to be pasting in the following commands:
cd ~/web;
git clone git@github.com:chriscourses/three-vite-boilerplate.git {query};
cd {query};
subl .;
npm install;
npm run dev;
This will download a Three.js boilerplate, place it in a new directory, install all project dependencies, and open everything up in your text editor and browser for immediate access and development.
Lets go over these commands in detail.
Commands explained
cd ~/web;
cd ~/web;
This should be customized to whatever directory you would like your Three.js projects to be stored in. If you'd like it stored in a folder called three, make a folder called three in your home directory and change web to three in the above command.
git clone ...
git clone git@github.com:chriscourses/three-vite-boilerplate.git {query};
This will duplicate a Three.js boilerplate and name it whatever you specify as your Alfred argument. So if we launch an Alfred command of mk3 solar-system, our project would have a directory name of solar-system.
cd {query};
cd {query};
This will change our terminal directory to the location we select with Alfred. If we were to type a command like mk3 new-project, new-project would be our query or the directory that we would want to go into.
subl .;
subl .;
subl . is a custom alias I created to open up any project I specify in Sublime Text. If you use a different text editor, you'll have to change this command to something that opens up your current directory with your text editor of choice. If you'd like to add the subl . alias to your system, add the following line of code to your .bashrc or .zshrc file (located in your home directory ~) depending on whether or not you use oh-my-zsh:
alias subl="/Applications/Sublime\ Text.app/Contents/SharedSupport/bin/subl"
npm install;
npm run dev;
npm install;
npm run dev;
These will install all project dependencies and open your project in the browser. For these commands to work, you must have NPM installed. If you don't have it yet, NPM comes pre-packaged with Node.js which you can download here.
When all of the commands have been customized and pasted into Alfred, continue onwards.
Once you hit 'Save', you'll now be able to make use of your new Alfred command. Test it out by launching Alfred with option + space and typing mk3 three-test:
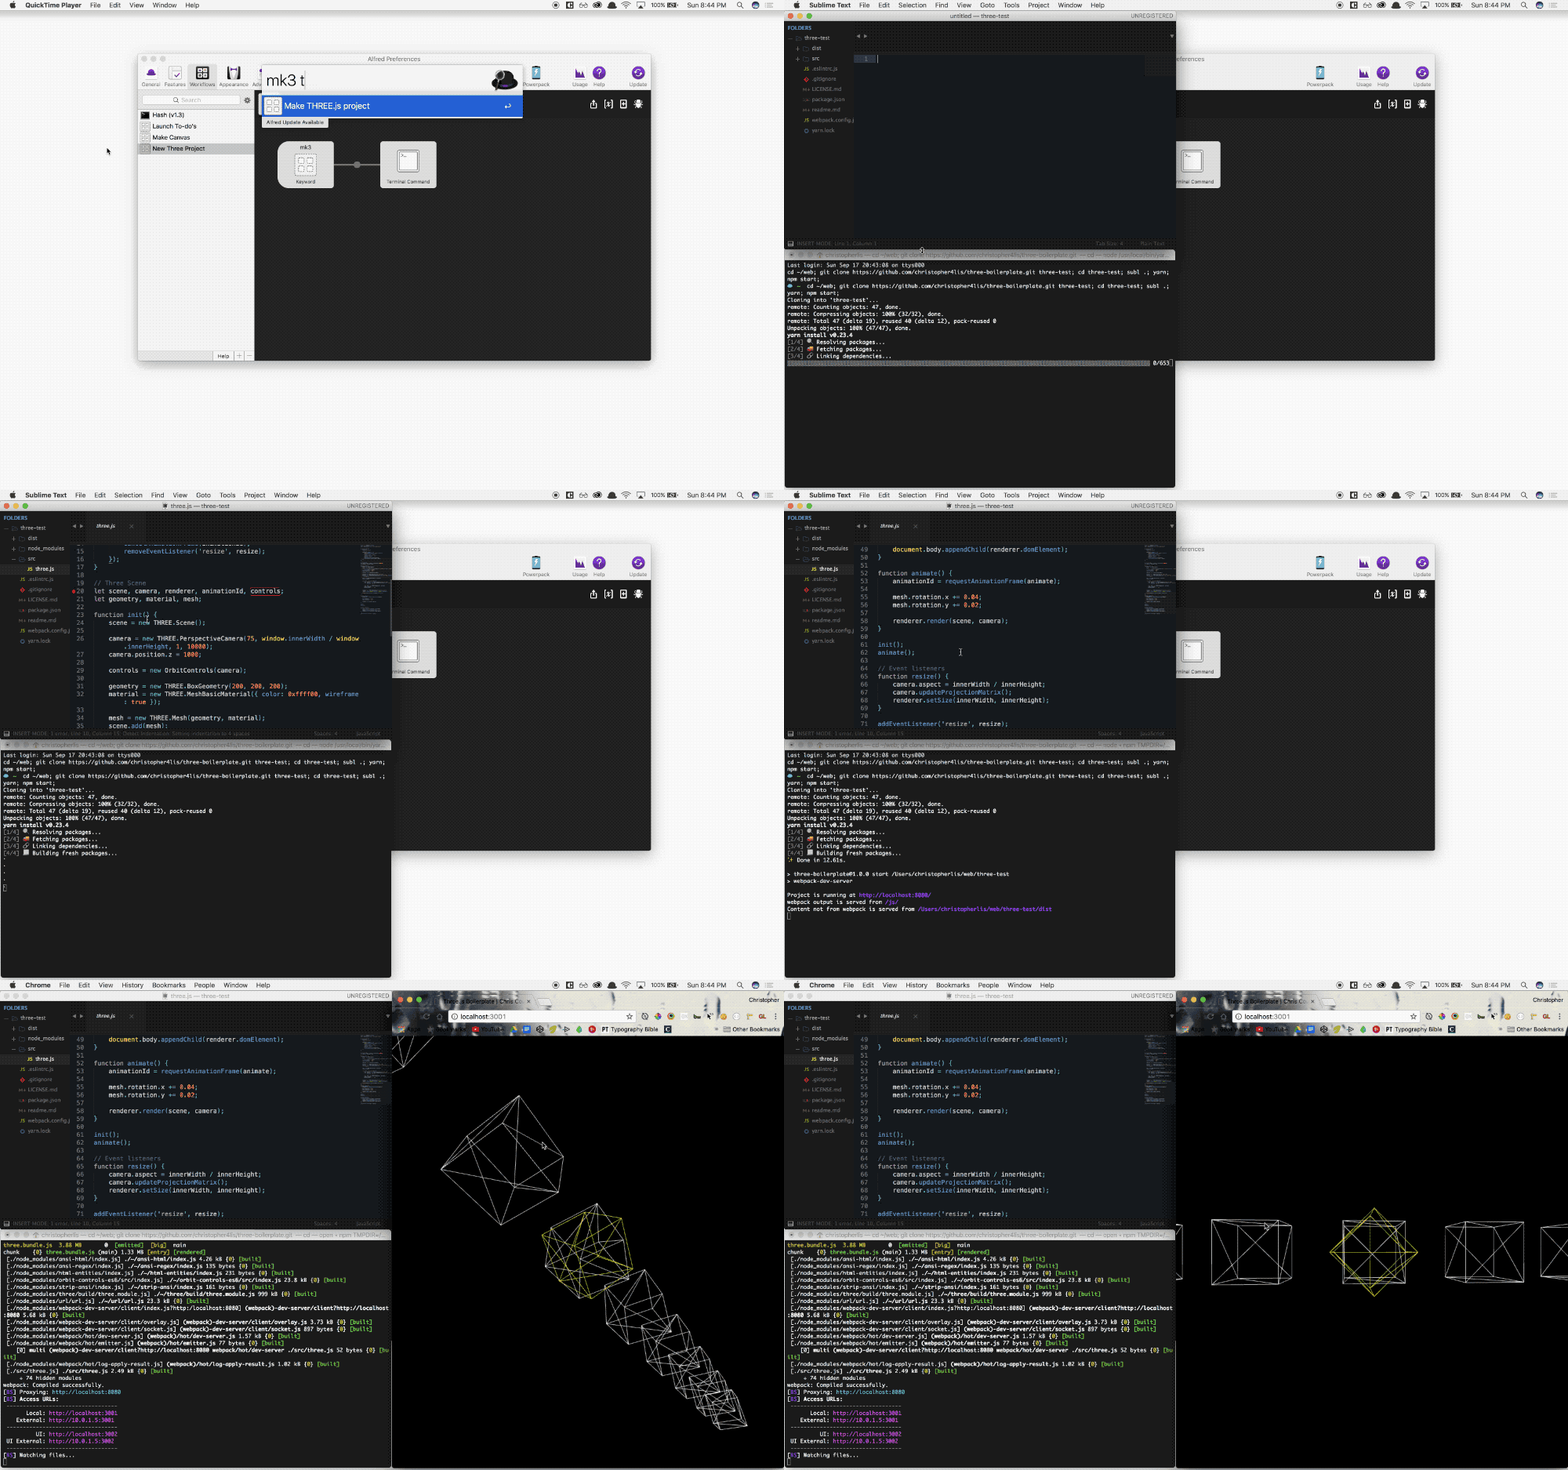
You should now be able to create a Three.js project in a matter of seconds compared to the minutes it would take to grab all of the boilerplate code needed to get things up and running. In addition, the boilerplate code also makes use of hot-reloading and module bundling so you never have to fully refresh your page, and you can combine all of your scripts into one file for performance purposes.
Wrap up
That's the gist of things. Whenever I need to create a Three.js scene, this is what I use so I can save myself the pain of going through tedious project setup.
If you run into any issues or have any questions, feel free to leave a comment below or hit me up on Twitter. PEACE ✌️


