Coding Collision Detection with HTML Canvas and JavaScript
If your game's collision detection is jank, you're gonna have a bad time.
To better my understanding of collision detection (and yours of course, how could I forget?) I'll be detailing out a few ways in which you can detect and react to object collision in real-time with HTML canvas and JavaScript.
Initial setup
To create some objects with HTML canvas we're going to need some initial setup.
As a prerequisite, you should have a simple <canvas> element in an index.html file. Here we'll use a <script> tag to load all of the JavaScript within index.js:
<!-- remove margin around canvas -->
<style>
  body {
    margin: 0;
  }
</style>

<!-- load javascript so we can draw on canvas -->
<canvas></canvas>
<script src="./index.js"></script>
// grab canvas from html and get "context" to make use of canvas API
const canvas = document.querySelector('canvas')
const c = canvas.getContext('2d')

// make canvas full width and height of the screen
canvas.width = innerWidth
canvas.height = innerHeight
Next, we'll create a Box class which precisely defines what a box should look like. It has some defaults like a red color and 100 pixels of width and height, properties we can easily change later on if needed:
class Box {
  constructor({
    position = { x: 0, y: 0 },
    color = 'red',
    width = 100,
    height = 100,
    velocity = { x: 0, y: 0 }
  }) {
    this.position = position
    this.width = width
    this.height = height
    this.color = color
    this.velocity = velocity
  }

  draw() {
    c.strokeStyle = this.color
    c.strokeRect(this.position.x, this.position.y, this.width, this.height)
  }

  update() {
    this.position.x += this.velocity.x
    this.position.y += this.velocity.y
  }
}
Take my Games 101 course (first hour free) and learn project setup, class syntax, plus everything else you need to know to become an expert HTML Canvas & JavaScript game dev.
Next we'll instantiate two objects from this class then render them by calling their associated draw methods:
// get canvas center
const center = {
  x: canvas.width / 2,
  y: canvas.height / 2
}

// instantiate box with left offset
const box1 = new Box({
  position: {
    x: center.x - 150,
    y: center.y - 50
  },
  color: 'red'
})

// instantiate box with right offset
const box2 = new Box({
  position: {
    x: center.x + 50,
    y: center.y - 50
  },
  color: 'blue'
})

// add gray background
c.fillStyle = 'rgb(39,39,42)'
c.fillRect(0, 0, canvas.width, canvas.height)

// draw boxes
box1.draw()
box2.draw()
Running this code, we should see two boxes rendered out next to each other near the center of the screen:
See the Pen Collision Detection - 1 by Christopher Lis (@chriscourses) on CodePen.
Adding movement
We could detect for object collision on initial load, but it's more likely that you'll be testing for collision between moving objects instead.
To get our boxes moving, we'll start by using requestAnimationFrame to create an animation loop. Next, we'll clear our canvas for each frame of our animation, draw out our boxes, then add a value of 1 onto box1's position:
function animate() {
  window.requestAnimationFrame(animate)

  // add gray background
  c.fillStyle = 'rgb(39,39,42)'
  c.fillRect(0, 0, canvas.width, canvas.height)

  // draw boxes
  box1.draw()
  box2.draw()

  // update box1's position before drawing it on next frame
  box1.position.x++
}

animate()
Running this code, our red box will move to the right (click "Rerun" to see effect again):
See the Pen Collision Detection - 2 by Christopher Lis (@chriscourses) on CodePen.
With one box moving, we can officially detect for whether or not two squares are colliding.
Basic collision detection
In brief, we need a way to determine whether our red box overlaps with our blue box. To do this, we'll need a total of four conditionals, but it's going to be easier to focus on one—one that can tell whether the righthand side of box1 overlaps with the left side of box2.
Since canvas coordinates always start from the top left of whatever object we're dealing with, to get the righthand side of box1, we need to add box1's width property onto its position.x property. Now all that's left is to see whether or not that value is greater than or equal to the left side of box2's position.x. If it is, we know that the two are colliding from the righthand side of box1:
function collision({ box1, box2 }) {
  return box1.position.x + box1.width >= box2.position.x
}
This function will detect for collision when used correctly, but there's no real use to implementing it if we aren't reacting to this collision in a meaningful way. To react to this collision we'll put this new collision function to use to determine if two objects are touching for every frame of our animation loop, and if they are, we'll turn their borders green:
// detect for collision (will they collide and should we render the next frame?)
if (collision({ box1, box2 })) {
  box1.color = 'green'
  box2.color = 'green'
}
Since our Box class has a color property that sets each box's strokeStyle within draw(), changing a box's color property will immediately change each corresponding box's stroke color.
With this we have the most basic collision detection we can ask for (one-sided box collision detection):
See the Pen Collision Detection - 3 by Christopher Lis (@chriscourses) on CodePen.
But what would happen if we moved box1 down a bit so as it moves to the right, it never actually touches box2?
See the Pen Collision Detection - 4 by Christopher Lis (@chriscourses) on CodePen.
As you can see, the boxes still turn green, even though they never touched. This means our collision detection code is faulty—we need to take the three other sides of our boxes into account when looking for collisions. We can do that by adding in the remaining three conditionals of the four that I mentioned earlier:
function collision({ box1, box2 }) {
  return (
    box1.position.x + box1.width >= box2.position.x && // box1 right collides with box2 left
    box2.position.x + box2.width >= box1.position.x && // box2 right collides with box1 left
    box1.position.y + box1.height >= box2.position.y && // box1 bottom collides with box2 top
    box2.position.y + box2.height >= box1.position.y // box1 top collides with box2 bottom
  )
}
These additional conditionals look for any overlap on the remaining sides of our boxes. We originally took care of the right side of box1 and the left side of box2, but to get full collision detection, we'll need to determine whether the bottom side of box1 and the top side of box2 are touching, then do the same for the left side of box1 and the right side of box2, and then again, the same for the top side of box1 and the bottom side of box2.
It can sound quite confusing if you're new to the technique, so to further clarify, I animated a straight-to-the-point video which you can view here for extra credit:
By updating our collision function with the three extra conditionals, our red box will no longer turn green as it passes by our blue box on the x-axis—the two must be touching to get the correct effect:
See the Pen Collision Detection - 5 by Christopher Lis (@chriscourses) on CodePen.
Order of operations
Now you may not know this yet, but the order in which we call our render operations is important. To react to collisions correctly, you're going to want to render things out in the following order:
- Clear canvas
- Draw objects
- Update objects
- Detect for collision
Imagine we're rendering out a frame on our canvas—we update our red square's position.x, call its .draw() method, and detect for collision. If the red square collided with the blue one, we can react to this collision however we'd like, but we'd be reacting to the collision after the fact—the red square would be drawn as if it's already overlapping with the blue one:
See the Pen Collision Detection - 6 by Christopher Lis (@chriscourses) on CodePen.
In this case, we let collision happen, and then we would react. This could be viable in some sort of implementation, but most of the time, it makes sense to react to the collision before it actually happens. This means we never actually draw the two squares overlapping with eachother.
Let's change our order of operations slightly.
We'll start by calling the .draw() method, update the red square's position.x, and then detect for collision. With this order, we're essentially asking one frame into the future, "Is the red square about to collide with the blue one?" We never actually show the collision, we just test if it's about to happen. If it is, we can restrict our red square from going any further, bouncing it backwards or stopping it at the perfect spot so the two are adjacent to one another.
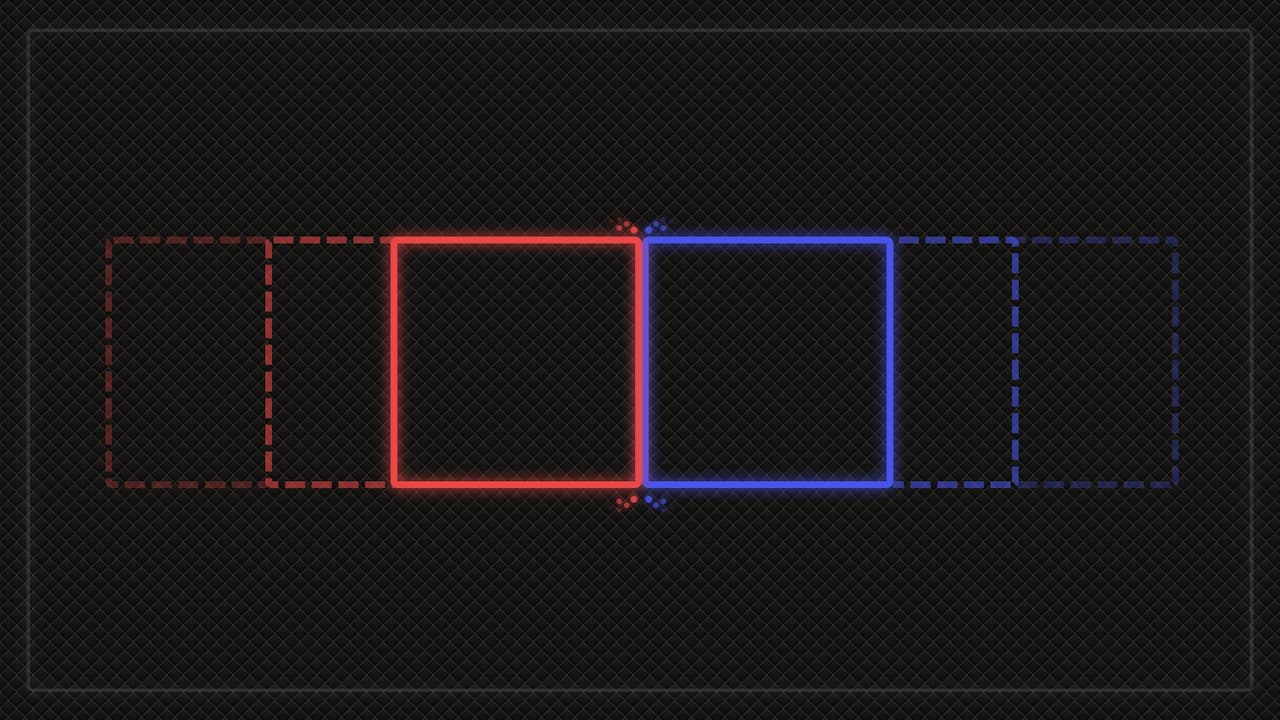
In this case, I've added some code to react to an impending collision by placing box1 in the perfect position so it looks like box1 and box2 are touching (you don't have to code this, I just want to illustrate a potential result of collision detection):
See the Pen Collision Detection - 7 by Christopher Lis (@chriscourses) on CodePen.
So rather than reacting to a collision after you've rendered it out, in my opinion, it makes more sense to react prior.
In summary, the order you'll want to call your collision detection code is as follows:
- Clear canvas
- Draw objects
- Update objects
- Detect for collision
This order clears our screen and renders our objects. Then, without actually moving our objects, we update their properties and test for collision to see if the next frame to be rendered will result in overlap.
We do not render an overlap and then detect for collision, we detect for collision first and prevent any overlap from occurring.
With this new knowledge in mind, let's react to our collisions by creating a robust bounce effect.
Creating a bounce effect
Taking the order of operations into account, we should start by giving our box red box a velocity.x since we know we'll be changing this property later on:
const box1 = new Box({
  position: {
    x: center.x - 150,
    y: center.y - 50
  },
  color: 'red',
  velocity: {
    x: 1
  }
})
Then we'll alter box1's movement code within our animation loop to make use of this new velocity property:
// update x position before render
box1.position.x += box1.velocity.x
Now, we can change up the reactionary code within our collision if statement so that we're reversing box1's movement on hit:
// detect for collision (will they collide and should we render the next frame?)
if (collision({ box1, box2 })) {
  box1.velocity.x = -box1.velocity.x
}
And this'll give us the effect of the red box bouncing off of the blue box:
See the Pen Untitled by Christopher Lis (@chriscourses) on CodePen.
With how quickly frames are rendered within requestAnimationFrame you might not be able to visibly see the effect of checking for collision before rendering out the next frame, but the little bit of precision you gain from rendering things the correct way will save you time and headaches from the rendering bugs you might receive by doing things out of order.
Conclusion
If you enjoyed this post or if you'd like to see more collision detection topics covered (gravity and collision blocks), be sure to let me know down in the comments below. You can also learn more by taking game and collision detection related courses right here on chriscourses.com. Otherwise, thanks for your attention and hope you learned a bit.